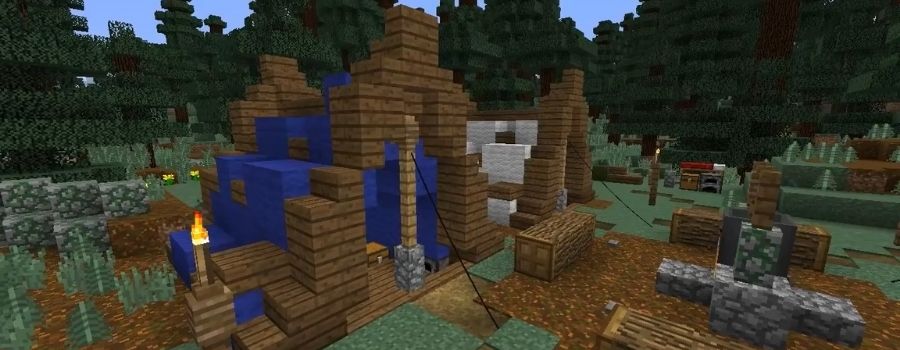
Minecraft is undoubtedly one of the most famous games in world history. Building a tent or shelter with Minecraft is an intriguing part of surviving in this game. Now question is that how to make a tent in Minecraft.
Minecraft is the game that I have played the most in my life. Making complex and beautiful tents for shelter might take some time, but the result always makes it worth it all.
There are plenty of tent ideas available on the internet. You can make your special shelters as well. But if you are new to Minecraft, then building a tent for the first time can get quite troublesome.
What type of tent do you prefer? I have categorized them into six levels according to the time needed to build them. They are nomadic, easy, medium, hard, extreme, super extreme, and innovative.
Page Contents
Step By Step Guide On How To Make A Tent In Minecraft
I will tell you how you can make a tent in Minecraft of the first three levels. So, read till the end for mastering tents of all levels.
Nomadic Level
Let’s start with the most preliminary nomadic level. These tents are easy, fragile, and take just a few minutes to build. It’s best to use them during emergencies. You do not have to stress about making a tent in Minecraft for these nomadic ones.
They are perfect for surviving the initial days in Minecraft. They are barely a tent, but it better to start with the basics.
Emergency Shelter
It just takes a few seconds. It works well when you are in an emergency and caught up with something far from your base. It is the ideal emergency Minecraft tent for newbies.
Required Materials
None.
Process
Just make a 3-block hole straight down and close the opening with dirt or any other thing available that can work as cover.
One of the primary drawbacks of this shelter is running into a cave. But if you dig only three blocks, then you will not counter any enemy cave. You can expend the shelter from thereon.
This shelter is a lot more reliable than it sounds. You can save yourself from zombies, creepers, spiders, skeletons, and endermen in just a few seconds. Sounds pretty good to me!
Easy Level
These shelters/ tents take a bit more time than the nomadic ones. But as the name suggests, they are easy shelters in Minecraft and fast to make.
Micro Mansion
You can build this tent anywhere and get a minimum space of 5×5 blocks.
Required Materials
- Around forty wooden planks
- Wooden Slabs
- Two wooden stairs
- Crafting table
- Furnace
- Door
- Double Chest
- Glass
- Torches/Glowstone
- Bed
Step To Step Guide
- Use the wood planks to create a 4×4 base with two blocks.
- Make the roof of the tent with wooden slabs.
- Now, position the door as per your choice.
- You can place the double chest on any wall but make sure you place the wooden stairs above it.
- The perfect place for keeping the bed is opposite the double chest.
- Use torches to light up the tent or hang a Glowstone in the wall anywhere.
- Use the glass as a window near the wall.
- Crafting tables and furnaces are essential equipment for any building. Place them opposite of where the door is.
Portable House
It is a 5-minute Minecraft tent. This tent takes five minutes to build and five minutes to destroy! The most convenient one in this how to make a tent in Minecraft. If you are tired of digging holes but lazy enough not to make a fort, you can try this.
Required Materials
- Stone, Wood, or Cobble. Any fundamental resource except dirt would do.
- Ladders
- Trapdoor
- Wooden/Iron Door
Process Guidelines
- First, you have to build a 1×1 tower using six blocks on top.
- Next, adjoin every corner with the blocks.
- After connecting the corners, build the wall and dig a 1×2 hole for the door. Do not use windows in this tent.
- After that, fill in the roof.
- But do not forget to keep a 2×2 opening at a wall. You will need this space for the ladders and trapdoors.
- Put the ladders beneath the hole. And then, make some battlements on the top.
- Lastly, place the trapdoor, and that’s it.
This way, you can make a portable fortress that’s protected from creepers. If an enemy like a spider comes in, the player can escape from the hatch.
Medium Level
These tents take 1-3 Minecraft days to build. They are suitable for an extended period of stay. They also provide decent protection.
Freestanding
This tent/shelter provides good protection against mobs. As it takes time too fast, it is not the tent to build on your initial days. It is simple, but you can customize it with extras.
You can build this on any flat surface. You can also flatten an area first and then build the tent. But, it is going to cost too much time. And it will cause you trouble if you can’t make the tent before nightfall.
Required Materials
- Cobblestone
- Stone
- Wood planks. It can be of any size you want. The required wood planks will be according to that.
Construction
- Start with the foundation of the shelter. Make it as wide as you want. However, as you know, the wider the base, the more time it will take.
- You can keep the floor as it is or make it a wooden floor, whatever you prefer.
- Hop and keep a block beneath you to make the shelter/tent taller. Keep doing this until you get your desired design of the tent and ensure a tall enough wall.
- Once the tent is completed, you can make an entrance to the rooftop.
- Finally, place a fence gate at the entrance. It is essential because, without a gate, the invading mobs can get in your tent and kill you.
- Also, keep your tent well-lit to prevent mobs from spawning inside. The larger the tent, the more torches you will need. A lantern in Minecraft produces slightly more light than a torch.
Extras
The Freestanding shelter is well-enough, but some extras are always great. You can build a watchtower for sniping for resources. Adding windows will cause no harm in this shelter. Skylight looks pretty cool and emits more light. So, it can keep the mobs away from you.
GrieferProof Freestanding Protective+
As you can tell from the name, it a modified version of Freestanding shelter. It is a decoy for griefers. So, it provides more protection. You can make it your permanent shelter, adding some defense around it.
Materials Needed
- Same as that of Freestanding shelter, just some extra obsidian.
Construction
- Follow the steps of Freestanding to build the shelter first.
- Now, lay the obsidian as the floor or the base wall.
- Coat the exterior part of the base with dirt or wooden planks to attract the griefers. (Build the tent on a griefer-prone area, else all this is useless).
- For the inner part, you can either use blocks or planks. Remember to cover the exposed obsidian, or it can warn the griefers moreover abate the look of your tent.
Building hard Minecraft tents can get super weary for the upper levels. It gets tough to explain these tents without illustrating. It is better to start with the easy ones in this article, how to make a tent in Minecraft.
You can make more complex ones on your own if you get the hang of these tents. You can add the extras mentioned here or choose from your resources to customize these tents. Try to make tents according to the environment you are in Minecraft.


Leave a Reply